![The many uses and benefits of resin tables [part 2]-22](data:image/svg+xml,%3Csvg%20xmlns='http://www.w3.org/2000/svg'%20viewBox='0%200%201680%20718'%3E%3C/svg%3E)
The many uses and benefits of resin tables [part 2]
Resin tables are extremely durable and adapt to any residential setting, whether indoor or outdoor.
This is the second part of our mini-serie dedicated to this broad and amazing topic. This time we’ll be talking of the various types of tables and their use and how an epoxy resin table is made by the artisan hands of incredibly skilled craftsmen. We will also get more in detail on how resin is made and finally we’ll give you some advice to make your own tabletop DIY.
Tables made of resin: structural elements
During the manufacturing process, materials having an actual structural purpose can be inserted into the resin.
The resin is frequently blended with marble or quartz powders, as well as other polymers or vegetable fibers, especially in kitchen table tops. This produces worktops that are much harder and more compact, with an appearance that is remarkably comparable to the original material.
There are resin worktops, for example, that incorporate pieces of the famed Carrara marble and have a texture that is nearly equal to that of a real marble slab. Unlike marble tops, however, resin tops benefit from the resin’s properties, such as increased resistance to wear and chemical agents.
Resin garden tables
Resin is a material that works well in outdoor settings due to its many features. On the market, there are numerous furnishing options that vary in shape, color, and design, all at very reasonable prices.
Resin tables with a creative flair
Resin tables are frequently made one at a time rather than in batches. Many contemporary designers employ this material for its adaptability, adorning table tops with various styles, shapes, and colors of embellishments.
The tables are made in molds in which the metal or wooden structure that will support the surface is positioned. The resin is then poured into the mold in a fluid state to create a continuous layer that will be flawless and neatly polished after drying.
It is also possible to adorn the surface with colored resins or various types of objects before the resin solidifies. Aside from being a one-of-a-kind and creative product, the end result is unquestionably decorative and delightful.
Tables made of resin and wood
The use of wood and resin in conjunction is fairly prevalent. The resin can be used in a variety of applications. Let’s have a look at some examples. To begin with, the resin can be utilized primarily by pouring a covering layer over the entire surface of the wood or by burying the wooden board in a thick coating of transparent resin. This final solution enables for the creation of an amber-like effect.
Another option is to utilize the resin as a finish inside a hardwood board, which will have its own set of consequences. Using resin micro-pours to fill indentations and cracks around the table’s edge is a famous example. This method helps you to bring attention to the problem region.
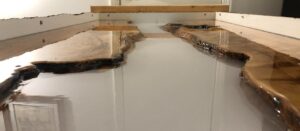
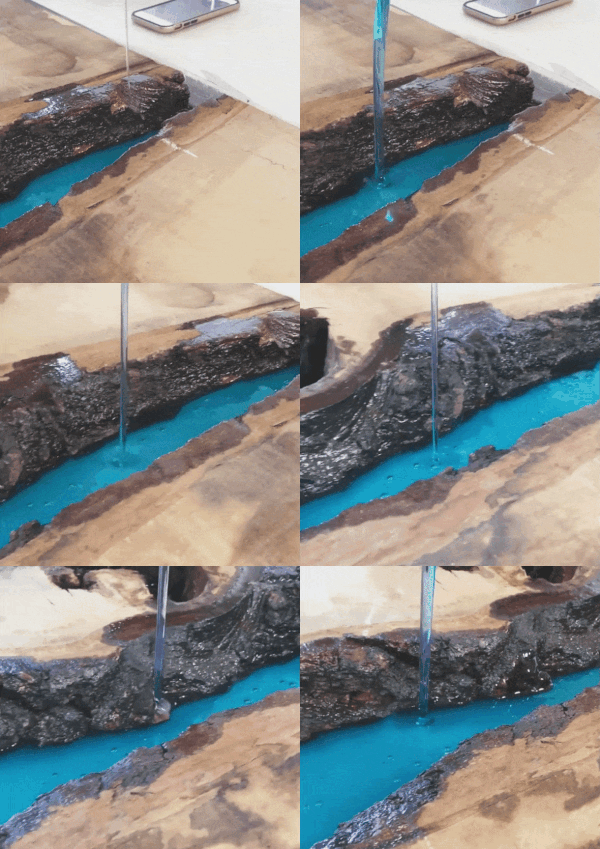
Another typical finish and complement technique is the use of resin to create so-called “rivers” . In an epoxy river table, the “rivers” are those areas of the table made of a material other than wood, have an elongated shape, and cut the surface in half, creating two ‘banks,’ much like a river. The resin is ideal for this task because of its smooth, bright, and shiny surface.
 Resin tables: applications
The epoxy resin tables are suited for any home and non-domestic environment: kitchen, study, office, living area, living room… You know that you buy them “from the catalog” or that they are commissioned to professional artisans. They’re also ideal for the outdoors, such as gardens, patios, and balconies. The most important thing is to select a product that meets our aesthetic needs and blends in with the rest of the environment’s style.
How to make your own
An epoxy wood table can also be made in a do-it-yourself fashion. The most important factor in ensuring the success of the project is to select a decent resin.
So, let’s have a look at the most important first measures to take.
 Getting the wood ready
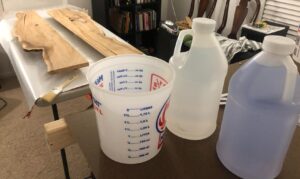
Select a piece of wood with a thickness of at least 2 or 3 cm and sand it with sandpaper. The wood will retain its original color if you use a fine grain (300-400) since it absorbs less resin. It is preferable to choose a coarser grain if you want a darker hue than the original (60-80).
The wood should next be chopped into many pieces and the dust and sawdust removed. To remove all moisture, place it in the sun or near a heat source for 24-48 hours.
Getting the frame ready
Make a wooden (or Plexiglas) frame for the table to give it shape. A thickness of 3-4 cm is recommended, or 1 cm thicker than wood in any case. Make a bottom for the frame and attach it to it. Place a sheet of polyethylene or nylon inside, adhering it to the sides with double-sided tape if necessary.
 Wood placement
As desired, arrange the wood pieces inside the frame. Other materials, such as stones, shells, leaves, metal, and so on, can be added if desired.
Preventative wood treatment
Brush all sides of the wood with around 300 g of resin (A + B). Soak all of the pieces thoroughly, particularly the more irregular ones. Wait for the resin-coated wood to set before placing it in its final place (it will take at least 8 hours).
The resin’s preparation
Prepare the remaining resin (A + B) and set aside for about a quarter-hour.
 Casting the resin
Pour the resin until it reaches the desired thickness. Use a hairdryer to pop any bubbles that appear on the surface. Allow the resin to harden for 24 hours.
Finish
Remove the table from the mold and use sandpaper or a hacksaw to smooth out any flaws. Squaring the table with a saw or a hacksaw and sanding (by hand or with a sander) with the following grits in order, 80, 120, 240, 320, 400, 600… would be the best finishing method.
Finally, use the wool disc to polish the table, followed by a fixing wax.
LTJarbor offer
We can discover the best suitable product for you and personalize it according to your needs and tastes thanks to our knowledge and availability.
Visit our website for a large gallery of our epoxy wood table.
article by:
A tech enthusiast with a passion for interior design,
architecture and modern technology.

![The many uses and benefits of resin tables [part 2]-22](https://ltjarbor.com/wp-content/uploads/2022/01/The-many-uses-and-benefits-of-resin-tables-part-2-22-e1642739105272.jpg)
![The many uses and benefits of resin tables [part 2]-24](https://ltjarbor.com/wp-content/uploads/2022/01/The-many-uses-and-benefits-of-resin-tables-part-2-24-e1642741688381.jpg)
![The many uses and benefits of resin tables [part 2]-26](https://ltjarbor.com/wp-content/uploads/2022/01/The-many-uses-and-benefits-of-resin-tables-part-2-26-e1642739770995.jpg)
 Resin tables: applications
 Getting the wood ready
 Wood placement
 Casting the resin
